Windmill Building Guide: Round Tower Windmills in Minecraft
Few structures capture the charm of the countryside quite like a windmill. With their circular stone towers and iconic spinning sails, windmills add character to farms, villages, and medieval landscapes in Minecraft.
In this guide, you'll learn how to use our circle generator to build authentic tower windmills with properly sized circular bases, tapered walls, and functional-looking blade assemblies.
Why Build Round Windmills?
- Historical accuracy: Traditional tower windmills use cylindrical designs
- Visual appeal: Circular towers look more organic than square boxes
- Interior space: Round walls efficiently use floor space
- Farm aesthetic: Perfect centerpiece for wheat farms and villages
- Spiral interior: Natural fit for ladders and spiral stairs
Windmill Styles
A modest stone tower with wooden cap and four sails. Perfect for small farms and as an introduction to windmill building.
📐 Specifications
- Base diameter: 7-9 blocks
- Height: 15-20 blocks
- Floors: 2-3
- Build time: 45-60 minutes
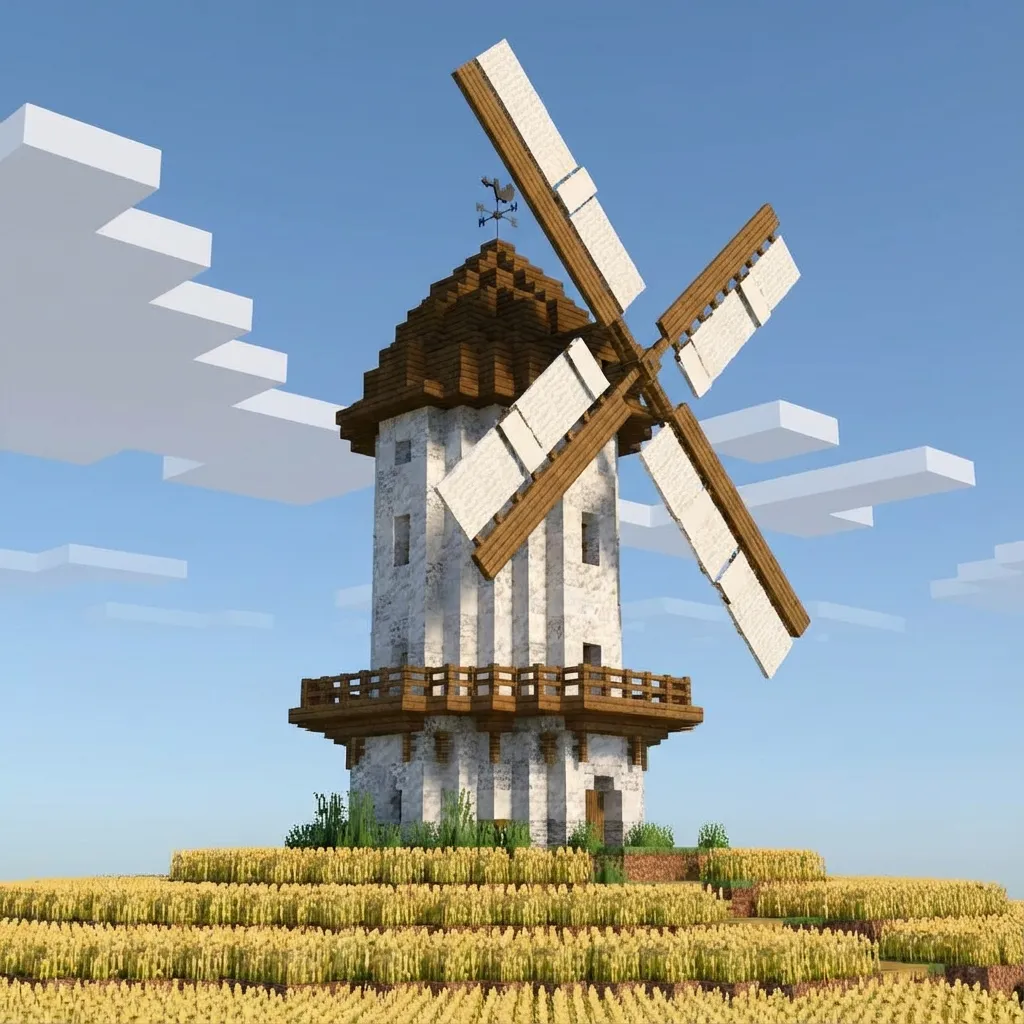
The iconic tapered tower windmill with a rotating cap. Features a wider base that narrows toward the top, with a wooden gallery balcony.
📐 Specifications
- Base diameter: 11-15 blocks
- Top diameter: 7-9 blocks
- Height: 25-35 blocks
- Build time: 1.5-2 hours
An octagonal tower that resembles a circle from a distance. Easier to build than true circles while maintaining the windmill silhouette.
📐 Specifications
- Base: 8-sided octagon
- Width: 13-17 blocks
- Height: 30-45 blocks
- Build time: 2-3 hours
Step-by-Step Building Guide
Generate Your Tower Circles
Open the circle generator and create patterns for your tapered tower:
- Base (floor 1-2): 11 blocks diameter
- Middle (floor 3-4): 9 blocks diameter
- Top (floor 5+): 7 blocks diameter
- Cap: 9 blocks (slightly wider for overhang)
Save each pattern for reference.
Build the Foundation
Choose a flat area (hilltops are traditional for catching wind). Lay your largest circle pattern and build up 2-3 blocks in stone.
- Use cobblestone, stone bricks, or similar for authentic look
- Mark your entrance door position
- Consider a stone base platform extending beyond the tower
Stack the Tower Sections
Build upward, transitioning between your circle sizes every few floors:
- 4-5 blocks per floor section
- Use stairs or slabs to smooth transitions between diameters
- Add small windows at each floor for lighting
- Vary materials slightly-mix in mossy cobble or cracked bricks
🌾 Pro Tip: Whitewash Effect
Dutch windmills were often whitewashed. Mix white concrete, quartz, or diorite into your stone walls for that characteristic bright appearance.
Create the Gallery Balcony
Most tower windmills feature a wooden balcony near the top where millers could adjust the sails:
- Build a platform extending 2 blocks from the tower
- Use dark oak or spruce planks
- Add fence railings all around
- Place this just below where the cap will sit
Build the Cap
The cap is the top section that holds the blade assembly:
- Slightly wider than the top tower section for overhang
- Use dark oak or spruce for contrast against stone
- Conical or dome-shaped roof
- Leave one side flat for blade attachment
Plan Your Windmill Tower
Generate perfect tapered circles for authentic proportions.
Open Circle GeneratorConstruct the Blades
The iconic four-blade assembly brings your windmill to life:
- Build an axle from the cap face (fence posts or end rods)
- Create a + shape hub at the end
- Each blade: 8-12 blocks long, made from stairs and slabs
- Use dark wood for the frame, white wool or banners for sails
- Angle blades slightly for 3D effect
Interior Design Ideas
Ground Floor - Storage
Grain sacks (hay bales), barrels for flour, and cart for transport. Include the millstone (grindstone or cauldron).
Second Floor - Machinery
Gears and shafts represented with trapdoors, pistons, and chains. This is where the grinding mechanism would be.
Top Floor - Living Quarters
Many millers lived in their windmills. Add a bed, small kitchen area, and storage for personal items.
References & Sources
Levi
Minecraft Architect & Hardware Expert
Levi has been a professional Minecraft architect and algorithm developer since 2019. Beyond specializing in computational geometry and voxel rendering, he is also an expert in PC building, hardware benchmarking, and optimizing system performance for the ultimate gaming experience.
Related Articles
The Geometry of Minecraft Catenary Curves
Deep dive into the mathematics and voxel plotting algorithms for sagging cables, ropes, and suspension bridges.
May 10, 2026Minecraft Chaos Cubed Update: Advanced Circular Architecture Techniques
Master the art of building circles and complex geometry using the new blocks introduced in the latest Minecraft updates.
April 18, 2026The Mathematics of Geodesic Domes
Deep dive into the complex geometry and algorithms for building geodesic domes perfectly in Minecraft.